Newborn photography tips with Stephanie Michelle Photography.
June 28th, 2024
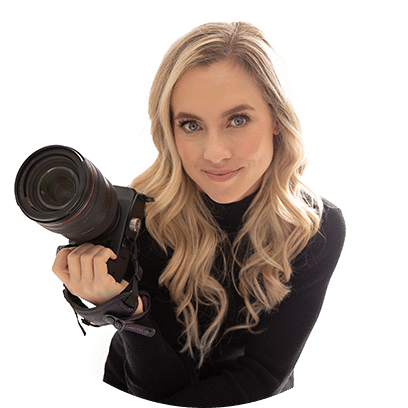
Stephanie Schnautz, owner of California based Stephanie Michelle Photography, is a distinguished member of the Zenfolio community and an expert in the art of newborn photography. Recently, Stephanie started offering newborn photography education, including a fourteen page digital download where she breaks down her newborn workflow from start to finish. She also offers full day one on one mentor opportunities at her California studio.
How did you get into newborn photography?
Before 2020, she had no knowledge of how to operate a camera. However, the birth of her children ignited a desire within her to learn photography properly. She emphasizes that while her journey was sparked by her own motherhood experience, one doesn’t need to be a parent to appreciate and excel in newborn photography. Stephanie’s quote encapsulates her journey: “It takes a lot of patience, but the more you do it–it’s like you have a love for it in your soul. I mean, it’s just something that kind of came out of nowhere. I never expected it, but newborn photography has definitely become a love of mine.”
How did you learn photography?
Stephanie’s journey into photography began with a bold leap into the digital world. She turned to online resources like YouTube and enrolled in classes at her local camera store, immersing herself in learning the craft. She emphasizes the importance of seeking guidance from experts and investing in education, especially when handling and photographing delicate newborns.
Stephanie’s dedication to education and her willingness to invest time and money reflect her commitment to mastery. She acknowledges the initial intimidation factor, particularly when handling newborns, but found her confidence by learning from professionals, including one of her assistants who was a NICU nurse. Stephanie’s approach underscores the value of continuous learning and collaboration in honing her photography skills. As she puts it, “With newborn photography especially, it’s really important to be learning from experts. So I took the time and invested money into that, which is partly why I love to give back.”
What are some tips on beginner-friendly poses for people starting out in newborn photography?
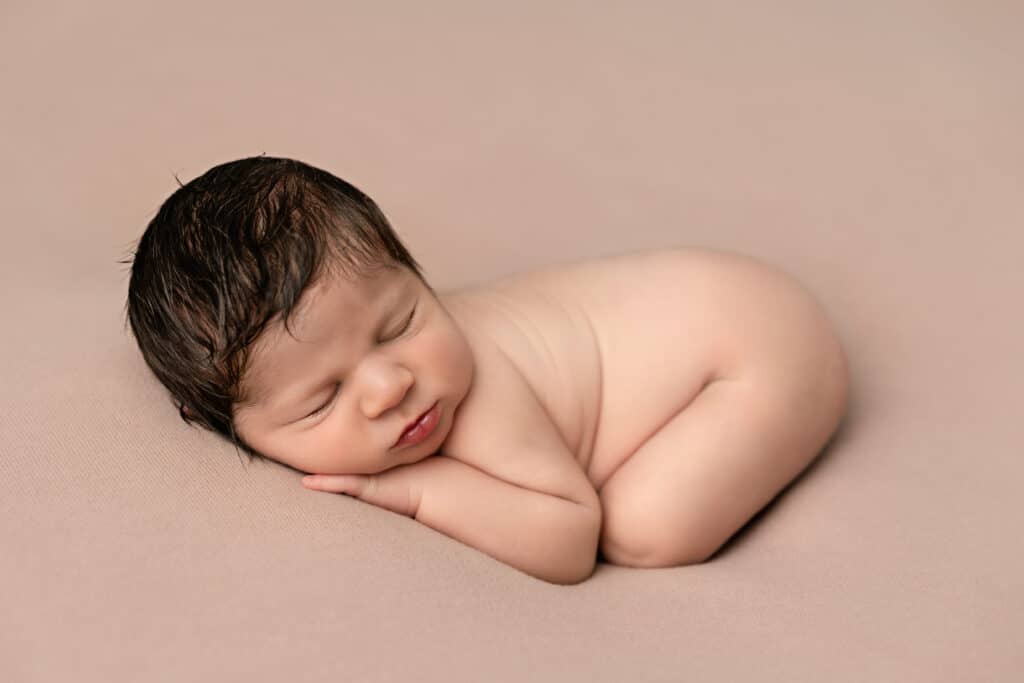
Stephanie’s Pro tips:
- Start simple with basic poses using minimal equipment.
- Avoid feeling pressured to use extravagant setups or accessories right away.
- Focus on mastering basic posing techniques before advancing.
- Swaddle the baby to help them relax and adjust to the studio environment.
- Find a balance when swaddling: ensure it’s snug enough to provide comfort but not too tight to restrict movement or circulation.
- Provide enough room in the chest area to ensure the baby’s safety.
Stephanie’s advice for novice newborn photographers emphasizes simplicity and patience. She encourages beginners to start with basic poses and minimal equipment, highlighting the importance of not succumbing to pressure to create elaborate setups prematurely. According to Stephanie, “Start simple. Don’t think that you need all of these props and accessories. You don’t need a lot.”
She emphasizes the value of mastering fundamental posing techniques before progressing to more complex setups. Additionally, Stephanie stresses the importance of swaddling to help newborns relax and adapt to the studio environment: “By bringing them into a different environment, it’s really important to give them time to get to know you, maybe rock them in your lap a little bit, hold them in the swaddle.” Her advice underscores the importance of finding the balance between just creating beautiful poses and doing so while prioritizing the comfort and safety of the newborns.
What are the essential tips for creating a comfortable environment for your newborn shoots?
In newborn photography, ensuring the comfort of the baby is paramount. Stephanie emphasizes the importance of warmth, security, and coziness in the studio environment. She layers multiple blankets on the bean bag to create a plush surface for the babies, explaining, “I have, like, I don’t know, five or six blankets on there. It’s not just a bean bag with one backdrop on there.”
Additionally, she utilizes space heaters to maintain a warm temperature, which she describes as ‘essential’ for any newborn photographer. Stephanie also highlights the significance of white noise machines to help babies sleep soundly during the shoot, stating, “That’s a very important essential tool with newborn photography, white noise.” She discusses the practicality of layering blankets, as the layered approach helps create smooth and efficient transitions between different backdrops.

What equipment and lighting setups do you recommend for capturing this light and airy look?
- Stephanie prefers to use a shoot-through umbrella for soft, even lighting without harsh shadows.
- She recommends the Godox AD400Pro flash for its versatility and effectiveness.
- Stephanie highlights the importance of using a V-flat, a versatile tool for controlling light and shadows during shoots.
- The V-flat can be used as a reflector or to block natural light from windows, providing consistent lighting conditions for photography.
Stephanie shares her preferred equipment and lighting setups for capturing stunning newborn images. She explains the benefits of using a shoot-through umbrella, stating, “‘It’s meant to be shot through, not bounce back.’ The spread of light it provides creates a soft, airy effect without harsh shadows.” She recommends the Godox AD400Pro flash for its reliability and versatility, emphasizing that “light is light” and any quality flash will suffice.
Additionally, Stephanie recommends the V-flat, a dual-sided reflector and light blocker that she considers essential for controlling lighting conditions in her studio and on location. She explains, “I use it as a reflector to fill in shadows or as a light blocker to control natural light from windows, ensuring consistency in my images.”
Turn your images into income.
Sell your photos online from your own custom store. Set up is quick and your clients will enjoy a seamless shopping experience.
How many days or weeks old are newborns when you photograph them?
Stephanie explains, “Yeah. So it’s different with every baby.” She continues, “Say the baby was born early, four weeks early, five pounds. I would say, okay, let’s hold off. Let’s wait for the baby to be seven pounds.” Stephanie emphasizes the importance of allowing time for the baby to grow and for both the mother and baby to adjust.
She states, “The sweet spot, I guess, I would say, your average would be seven to ten days, but it’s always different.” Stephanie highlights the variability in newborn photography, noting that factors such as birth weight, gestational age, and health status influence the ideal timing for the shoot. She adds, “I think some photographers are very strict on, like, it has to be seven to ten days. But it doesn’t have to be seven to ten days.” Stephanie prioritizes the comfort of both the mother and baby above all else, noting, “You just want mom and baby comfortable, most of all.”
She shares a recent experience highlighting the flexibility in newborn photography where she photographed a preemie baby who was technically eight weeks old, but whose gestational age was more like five weeks and was sweet and easy to photograph. Stephanie concludes by expressing the versatility in capturing memorable moments regardless of the baby’s age, stating, “You can always wrap a baby if they’re more awake.
How long do your newborn sessions typically last?
Stephanie explains, “I send a timeline out to the parents beforehand, kind of an idea of what the day will be like.” She continues, “I usually say three to four hours is what my session time will be.” Stephanie emphasizes the importance of flexibility, stating, “Sometimes it goes a little over, sometimes it goes a little under.” She elaborates, “I don’t rush my client. Sometimes the baby needs extra love from the parents.”
Stephanie clarifies that she doesn’t set strict deadlines for sessions and doesn’t book back-to-back newborn sessions. She emphasizes, “That morning is kind of for that specific client.” Stephanie concludes by affirming that her clients and herself are comfortable with the longer session times, as they allow for a variety of images in the gallery and take much of the stress out of the session for all involved.
Can you describe what measures you follow when posing and handling, to minimize any of the potential risks or discomforts for the baby?
When posing and handling newborns, Stephanie emphasizes the importance of having an assistant or spotter nearby for safety. She often has parents assist, although advises against bringing the mother too close to the baby once it is settled in and sleeping. Instead, she typically asks the father to assist or uses a paid assistant. Stephanie stresses the necessity of having someone nearby to help in case of any sudden movements and for spotting while posing the baby, especially in more complex poses like bucket poses.
Stephanie offers crucial tips for handling newborns delicately, emphasizing the need to be gentle and cautious. She advises against forcing babies into poses and recommends respecting their comfort and limitations. Stephanie highlights the importance of using flat hands and soft touches during adjustments. She notes that each baby is unique and may have preferences or sensitivities based on their time in the womb, so it’s essential to let the baby guide the posing process. Stephanie’s emphasis on safety measures and gentle handling reflects her commitment to ensuring a comfortable and risk-free experience for the newborns she photographs.
What are some of the advanced and composite newborn poses you do?

Baby suspended in fabric swing.
Stephanie: “Yes. …some of these pictures that I take give different illusions of what you think they are, but this is a baby on its back, very safe. I have my spotter bottom right corner with her finger, holding the baby’s legs up like that, and then I edit it out after. I mean, thank goodness for Photoshop. Right?”

Basket pose.
Stephanie: “With a basket pose like this, there are safety measures you take, too. I get those [soft] five pound weights from Amazon or something, and there’s a five pound weight in there because you don’t want the weight of the baby to be more than the basket and tipping over.”

Froggy pose:
Stephanie: “In the final image, you’re not seeing somebody else’s hand holding her head up.”
She goes on to describe that she’ll usually go into this from a side sleeping pose, and shift the baby into a more forward-facing position with their wrists together. Stephanie states “I’m taking one picture with me as the photographer holding the baby’s wrists together and kind of holding her up…My assistant, as I’m letting go, is behind the baby and grabs the top of the head and hold the head in place, kind of lifting the weight a little bit. Then you just composite them together, so the baby’s safe the whole time…Never ever leave a baby [posed] like this by themselves. And with the froggy pose, you do have to have a very sleepy baby, so it doesn’t happen at every session.”
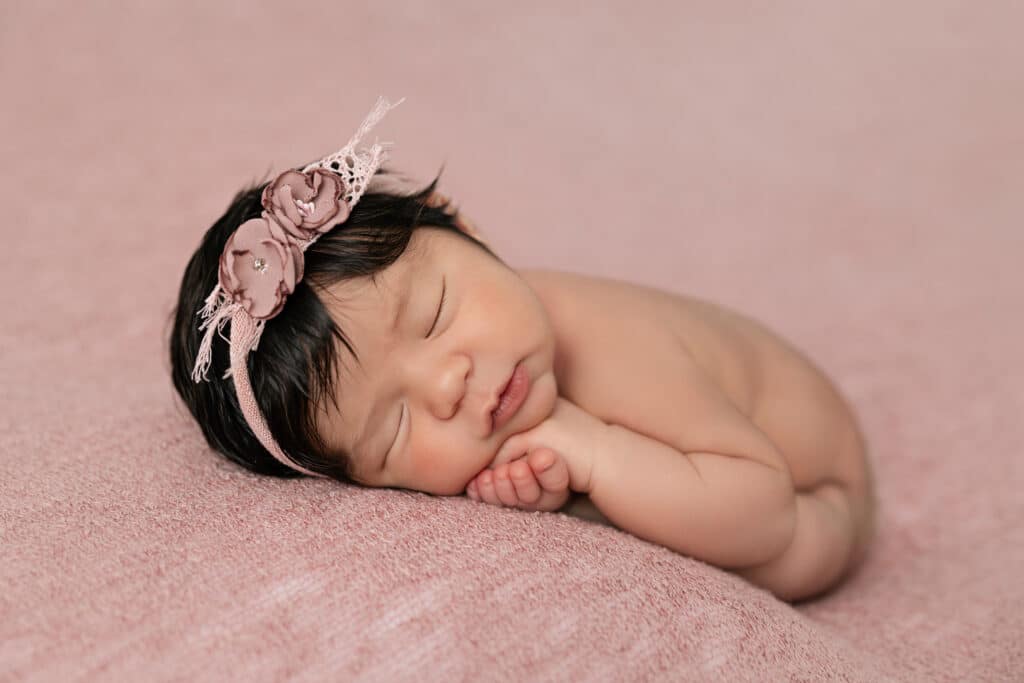
Womb pose:
Stephanie: “So this is called Womb pose. And sometimes taco pose, people call it–but sometimes the baby doesn’t want to be in that position. I think it’s just the way that some babies are positioned in the womb and certain things that feel good and don’t feel good. So I never ever force poses.”

Wreath or dreamcatcher poses:
Stephanie: “I have actually one spotter on each side for extra safety, and the whole entire dream catcher is actually on a little bench first. I take the picture on the bench with the baby in there, and then I have my assistant grab baby once I get that shot. She grabs the baby, takes the baby out. I stay in place so the camera is in the exact same place, and then my assistant will grab the bench out of the way. Then I take one with just the swing floating, and I composite them together. Safety first always, that baby is never floating in the air.
How do keep the baby’s face from sinking down into the bean bag?
Stephanie: “Oh, that’s a good Q. There’s pillows. But you don’t don’t have to buy expensive stuff, like I said before. I know there’s some really good newborn photographers out there that don’t even like pillows. They take little towels, like, hand towel size and then they fold it up and then slowly they’re lifting the baby or putting them where they need to. So anything works. Like I said, you don’t have to buy expensive newborn pillows. You can just use little towels.”
At what point do you add in family members or siblings?
Stephanie: “So that depends on how old the toddler is. If a toddler’s younger, they’re not going to be giving me a lot of their attention for very long.
So I’ll start. I already have babies swaddled. I’m in my first set. I’ll go ahead and put the sibling in a couple of these photos and just kinda have them looking at the baby, very sweet portraits that the family always loves.
If it’s just parents, I might wait a little longer till I pose the baby more, and then I can kind of undress the baby and get more portraits of parents holding the baby without the swaddle on. I kind of play that by ear–maybe the parents want to get the photos out of the way, maybe dad has to go or something.”
Stephanie’s Pro tips for including siblings:
- Avoid letting parents give electronics to siblings during the photoshoot to prevent tantrums when the devices are taken away.
- Utilize little squeaky toys to keep children engaged and giggling during the session.
- Have neutral-colored stuffed animals on hand as a backup to help keep children cooperative and focused on the shoot.

Do you give the parents any tips, ahead of time to prepare the the baby or themselves for the shoot?
Stephanie: “Yes. I think that is so important. I used to not do that, and I saw my newborn photography really take off once I started doing that. I have a client guide–since I have a workflow, I’m able to send them out a timeline beforehand with their workflow for the day, and then tips on little things you don’t really think about. Like, if the mom’s breastfeeding, don’t have her eating spicy foods the day before. That can cause gas.
And then I plan the feedings around the arrival at my studio. So I think that’s really important. You want that baby to come hungry so that mom or dad can feed them and get them to sleep. I definitely recommend sending a preparation guide out to your clients beforehand with little tips on how to prepare.”
What lenses are you using?
Stephanie: “So I recommend a 28-70 or 24-70. I prefer that lens because sometimes I do go all the way in at seventy for some nice close-up dreamy portraits. I like having that freedom to be able to zoom in or zoom out.”
What’s your go-to aperture and ISO settings on your camera in one of your typical shoots?
Stephanie: “Since I am doing studio, it’s pretty much the same. Shutter speed is always around 1/200, ISO 200. I’m usually at f2.8, but I go up and down a tiny bit.
The only time I would take it up is family portraits, the subjects are always at f4.0. Sometimes I’ll take it up to point six. Most of the baby shots are taken at f2.8. And detail shots I might bring down to f2.0, like little feet.”
How do you go about building a portfolio and attracting new clients into your newborn photography niche?
Stephanie: “The most important thing is to make sure that your website is up to date. If you have a client guide, make sure that’s up to date as well. I use Zenfolio. They have a lot of different templates that can match all sorts of different branding or aesthetic. And it just looks really nice on my website.
I like to make sure that the photos that I’m showing are photos that I want to take for future clients. You don’t want to post something that you think is just mediocre and you don’t want to do that shot again. That’s pointless. Make sure everything’s up to date and it’s pictures that you are proud of that really show off your work and look aesthetically nice next to each other to show a brand.”
Get started for FREE!
Save time and money with Zenfolio’s all-in-one solution. Build your website, share your galleries and sell your photos.
I noticed that your portfolio is very consistent in your brand–light, airy, clean, a lot of white backdrop. Do you think it’s important to have a style that’s recognizable?
Stephanie: “Definitely. And I think that’s one of the reasons why my photography took off pretty quickly is because I chose a style and something that represented my brand. One of my mentors, she told me the biggest tip that she could give is you want people to look at a photo and say, ‘Stephanie Michelle photography took that. I can tell. That’s her style.’
So figure out what your style is, and that’s another reason it’s important to have a workflow. It’s kind of working to make sure you always take your brand photos, and it just kinda makes it set apart from others, gives you a unique look, whatever it may be.
On that same subject. don’t be afraid to outsource things–maybe hire a graphic designer to do things for you. Or for me, social media isn’t really my strong point, so I hire somebody to make my reels and make my content. Don’t be afraid to outsource things, it can really help take your business to another level if you just start trusting people to do your things.”
Can you tell us about your workflow guide and educational series?
Stephanie: “I’ve been talking a lot about a workflow in this Zoom call so far. So a workflow is essential for any newborn photographer. If you talk to any very successful newborn photographer, they will say they have some kind of workflow. And basically it keeps you from having those moments of uncertainty during your sessions; helps you know what poses work well to transition into others, how to incorporate toddlers, how to incorporate just parents, family members, all of that. So I break down my workflow from start to finish in this fourteen page digital course and I’m offering it on my website.”
Head over to Stephanie’s Photo Education Instagram account to unlock a $100 discount on her personalized 1:1 mentoring by mentioning this webinar! Plus, grab her exclusive Workflow Educational PDF for just $99 using promo code WEBINAR50.

