How to become a professional food photographer.
Food photography is the genre of still life photography that puts food as the focus of each image.
Generally speaking, the goal of food photography is to make the food look appetizing and desirable — whether that be capturing an elaborate holiday feast spread in a series of mouth-watering photographs, or shooting a simple collection of a local farmer’s fresh produce.
Professional food photos fill the pages of high-quality cookbooks, illustrate restaurant menus, and bring social media accounts and food blogs to life. Food photography can also tell cultural stories or provide commentary on the food industry.
Since most food photographs are used to market products and/or services, food photography often falls under the larger category of commercial photography, although editorial styles of food photography do exist.
How much do food photographers make?
Earnings vary widely for food photographers in the United States.
Salaried food photographers usually enjoy company benefits such as vacation days, health and life insurance, and savings and pension programs.
Freelancers are not limited by the number of clients or projects they may be working on at a given time, and thus have the ability to earn more than their salaried counterparts. However, their earnings depend on their business savvy, experience, and location – and their total income is offset by having to cover all of their operating costs and things like providing their own benefits.
Food photographer salary.
The average base salary for food photographers as of October 2022 is $59,025.
From our State of the Photography Industry report for 2022, the average income earned by food photographers can be broken down as follows:
- About 13% earned $10,00 or less
- A little more than 27% of food photographers made between $10,000 and $20,000
- Almost 15% earned $20,000 to $40,000
- About 10% had an annual income in the $40,000 to $60,000 range
- Almost 6% had an annual income range of $60,000 to $80,000
- A little more than 4% had an income of $80,000 to $100,000
- Most surprisingly, a solid 25% of food photographers made more than $100,000 last year—surpassing the top earning percentages in any other photography specialty.
Demographic data from State of the Photography Industry Report.
According to our 2022 State of the Photography Industry report, commercial photography (into which category food photography primarily falls) came in at 6.3%, the seventh of the top 15 photography specializations reported.
Traditional word-of-mouth remains the top method of marketing for food photographers and portfolio websites are reported as the most important client acquisition tool, especially for self-employed freelancers (which make up 71% of respondents).
The full report also details the most popular gears utilized by professionals in the industry, with the top three preferred focal lengths for food photography being 24-70mm, 50mm, and 105mm.
The COVID impact on the food photography industry was less than in other shoot types and appears to be one of the most resilient photography niches over the past year.
Professional food photography equipment.
It isn’t easy to capture the essence of a delicious dish in a single image. Professional food photography equipment, however, coupled with competent skills can produce food photographs that make you want to lick the screen. Let’s go over some of the basics of food photography equipment for professional use.
Camera.
Presenting food in an appealing way through beautiful two-dimensional images requires a solid camera, but you don’t need to have a top-tier camera to get strong images.
The size and resolution of your sensor play a big part in how your images will look. For example, a crop sensor camera essentially makes your lens focal length longer so you may struggle if tight spaces unless you have an ultra-wide lens. Cameras that produce high quality images at high ISO are recommended especially since you may sometimes be working in situations with less than optimal light. Just remember that a higher ISO will mean more noise in your images.
Professional food photographers use cameras that can shoot RAW, resulting in image files that are lossless – that is, images that can withstand endless editing without losing data.
The number of focus points is also crucial for capturing focused, detailed shots. These factors make the DSLR one of the best cameras for food photography, for professionals and amateurs alike. According to our State of the Photography Industry report, DSLR’s are preferred over mirrorless cameras among food photographers.
Lens.
A professional quality 50mm lens is one of the best lenses for food photography. With a prime lens, you can capture beautiful tablescapes that highlight more than just one food at a time, while producing sharp, focused images. A 50mm lens produces a field of view that is similar to the human eye so it feels familiar for the viewer when looking at images in this focal length. It’s a flexible focal length despite being a prime lens. That being said, we would also recommend having a wide angle and a telephoto option for when the need strikes for a different look.
A zoom lens can be quite useful when you need to capture high-quality images and need some flexibility. If your budget allows it, a good 24-70mm zoom lens lets you easily capture the subject without having to physically move around since you can simply zoom to the focal length you want.
Look for lenses with built-in macro functionality perfect for capturing mouth-watering shots. Lenses with wider apertures give your food images blurred backgrounds that focus viewers’ attention on the subject.
Lighting.
As with most types of photography, lighting can make or break an otherwise well-composed food photograph.
When considering the best lighting for food photography, remember to keep the food itself in mind. Cold white light may not be the best lighting choice for capturing ice cream sundaes, for example. Instead you might want to photograph the ice cream in full sunlight, evoking a feeling of eating a sundae on a hot summer day for the viewer.
Backlighting creates a nice, appetizing glow on the top of shiny food; side lighting is a simple, all-around approach that brings much-need clarity to an image. Play with the lighting angles to determine the best way to highlight the subject. A powerful strobe light shines a spotlight on the main dish, while a softbox or diffuser work to soften and spread the light more evenly giving your light a more pleasing effect.
Tripod.
Due to the still life nature of food photography, It’s important — and quite commonplace — to create a set-up that allows you to take stunning photographs each time. This is especially true if you’re taking a series of images that will be used for similar applications, like shooting an entire menu for a restaurant’s food delivery app. Consider investing in a tripod for food photography. Capturing food photographs by hand allows for the greatest flexibility and creativity; however, a tripod doesn’t get tired during a long shooting session, and can be useful in taking pictures of food from the top.
Softbox.
Harsh lighting casts hard shadows on food, potentially making it look less appetizing. Using a softbox for food photography helps to bring clarity and detail into each photograph. A soft box distributes the light from a light source evenly across the scene, usually at a 45-degree angle for food images. Portable and easy-to-use, softboxes are recommended for any food photographer.
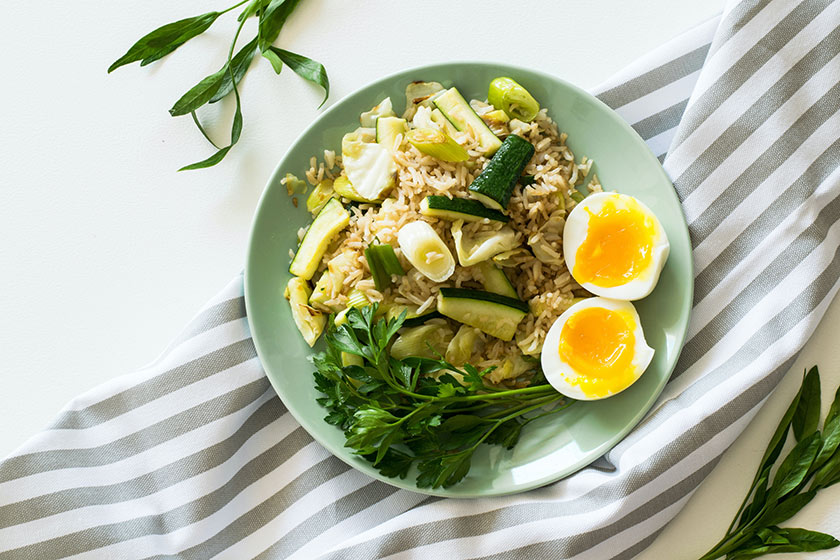
Props.
Every memorable food photograph has more than just the food itself visually present. Food photography props add spice (sometimes literally!), color, movement, texture, and style to an otherwise straightforward photo. For starters, here is a list of some of the most commonly used food photography props:
- Stump planks
- Plants and flowers
- Baking sheets
- Marble or wood cutting board
- Acrylic ice cubes
- Vintage teacups
- Pine branches
- Candles
- Wooden utensils
- Linen Napkins
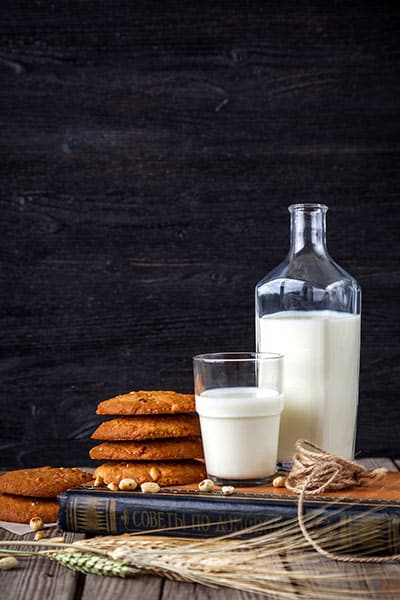
Filters.
A discussion of the “tools of the trade” wouldn’t be complete without a brief mention of the best filters for food photography. A neutral density filter will give you more flexibility with your exposure times, especially if there is a lot of light or you’re trying to capture motion in your images with a long exposure. You will also want to invest in a polarizing filter to help reduce glare. In food photography, there are a lot of reflective elements from glasses and bottles to the reflections in the oils on a salad dressing. A polarizer will help reduce some of that glare.
How to start a food photography business.
As far as photography niches go, food photography has few barriers to entry—anyone can begin practicing with a decent camera in their own kitchen!
Having all the right equipment isn’t enough, however. To earn a living as a food photographer, building a thriving business around your passion may be the next best step to take. Here’s our take on how to begin a professional food photography business.
Study food photography.
While no formal training is necessary to branch out into this specific photography niche, time spent studying successful food photographers, and examining their best work provides you with insights into different food photography styles, as well as filling your creative tank with ideas.
Begin shooting.
It might seem a little premature to start shooting this early into your career; however, it takes time to develop skill, find your own style, and craft those portfolio-worthy images that demonstrate how competent and comfortable you are with original compositions, unique props, and use of lighting. The best thing you can do is start shooting, and practice, practice, practice.
Build a food photography portfolio.
The internet is teeming with a seemingly endless supply of food-related photos. What makes your work different from the hundreds of other food photographers? Your food photography portfolio should be more than just a collection of your work with a brief bio and a contact page.
An online portfolio website is a window into your creative vision and technical abilities, inspiring potential clients and fellow photographers to want to work with you.
Invest in high-quality equipment.
Although you might feel that this step should come earlier in your career journey, we encourage professional and amateur photographers alike to start (or continue) investing in higher-quality equipment (as we’ve covered above) only when you have a clear picture of what you need as a food photographer.
Reach out to potential clients and partners.
When you have a portfolio of images and you have a clear idea of your own artistic vision, creative abilities, and technical capabilities, it’s time to let local restaurants and food bloggers know what you can offer them. Consider offering your services at a discounted rate to gain experience, and always provide the best work and customer service.
How to take professional food photos.
As you develop your food photography skills and gain more hands-on experience within this exciting niche, there are some key things to look out for when you’re seeking to capture all the colors, textures, and shapes of a delicious dish in a single mouth-watering photograph.
Lighting.
Natural light may transform your food photography; but be wary of bright patches of unshaded sunlight that may give your food dark, unappealing shadows, and blown-out highlights. Whether you’re using natural or artificial lighting, aim for an evenly lit, textured, and defined aesthetic that brings out the details of the subject.
Food styling.
Food Stylist is a job all in itself, but sometimes there is no budget for a stylist, or you’re comfortable taking that part on yourself. Think about how each element included in the scene will contribute to the overall effect. For example, bits of coconut sprinkled over a bowl of cereal or a swirl of lemon peel next to a salmon filet on a wooden cutting board are just a couple stylistic techniques that add interest, color, and deliciousness to a food photograph.
Props.
Cutlery, fresh ingredients (used to make the cooked main dish, for example), cloth napkins, and garnishes add color and texture to the picture without taking the spotlight away from the main subject. Don’t be afraid to think outside the box when it comes to props in your images.
Composition.
Rarely is the main dish the only subject in a truly great food photograph. The food itself is often styled with dishes, utensils, and even other dishes in the background to draw attention to the main subject while adding interest. Consider how elements are interacting with each other, where ingredients are placed in relation to the negative space, and how things like leading lines are helping to direct your viewer’s attention.
Artistic style.
Take a look through the portfolios of successful food photographers, and you’ll see that each of them has a signature food style that’s apparent in each of their images—rustic, modern, minimalistic, flamboyant. Hone your artistic touch, and bring out that style in each shot you capture.
Build an online portfolio website you love.
Put your food photography in the spotlight.