Wedding photography tips.
If you want to make a living as a photographer, wedding photography is a great niche to work in that will always be in demand. Whether you’ve already shot some weddings or you’re just getting started, we’ve created this guide full of wedding photography tips to help your next gig go as smoothly as possible. The more knowledge about lighting, poses, and other tips you have in the back of your mind, the more you’ll be able to draw from in the moment to create the best possible images for your clients.
As is the case with all kinds of photography, the best teacher is practice. But before you start, it helps to have some knowledge under your belt to guide your exploration. That’s what you’ll find in these wedding photography tips: a ton of helpful information, along with answers to questions you’ve probably asked yourself about wedding photography.
14-day free trial. No credit card required.
Free Download
Download this wedding shoot equipment checklist to make sure you are prepared for every wedding shoot.
Introduction: Wedding Photography Basics
Successfully capturing a wedding requires having all the wedding photography basics covered. There are a lot of moving parts to think about, and you have to be prepared and flexible so that you can capture the event as it unfolds. As you prepare for your wedding gig, make sure you’ve given some consideration to each of these areas:
- Your camera: There are lots of different cameras that can potentially be suitable for shooting weddings. Ideally, yours will be comfortable enough to carry and shoot with all day and night, and fast enough to capture all those special fleeting moments. You’ll also want to consider a camera that has dual card slots so your images are protected, as well as a full frame sensor in order to gather the most information possible.
- Lenses: Whether you opt for a zoom lens, several prime lenses, or a combination, you’ll want to consider the space and conditions in which you’ll be shooting. For an intimate wedding, you may not need a zoom lens. For a large wedding in an expansive venue, a zoom may be your best bet for capturing things at a distance. As a general rule you’ll want to have a selection of wide angle, mid-range, and telephoto lenses so you’re covered across a range of focal lengths.
- Lighting: we’ll go over this in more detail, but it’s important to know the lighting situation in advance so that you can choose your equipment accordingly.
- Your shot list: You can go over this with the couple beforehand, and you might also develop a standard shot list that you use for every wedding. Not every wedding is the same, of course, so being flexible is key, but there are a lot of “standard” shots that you’ll want to capture throughout the day.
Wedding photography can also involve multiple events aside from the actual wedding ceremony and reception, such as an engagement shoot and rehearsal dinner photography. For each event, you should go over this list to make sure your wedding photography basics are covered.
Wedding Photography Poses
Knowing a bunch of different wedding photography poses gives you and your subjects some flexibility in creating the perfect shot. By recommending different poses for them to try out, you’ll make your subjects feel at ease since they won’t have to try to come up with poses themselves.
Romantic Couple Poses For Wedding Photography
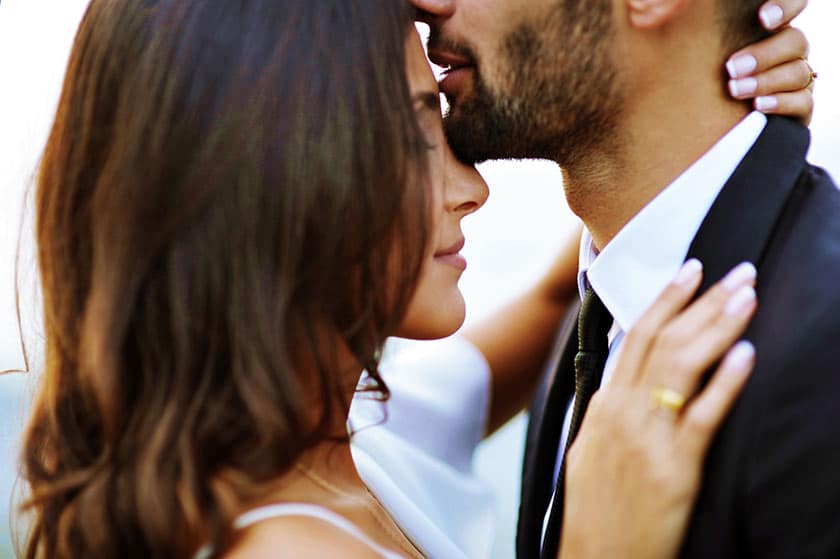
- Forehead kiss: A great way to create a romantic moment is to have one partner kiss the other’s forehead. Have the partners face each other, while the one being kissed tilts their face toward the camera and gazes down. It will feel natural and intimate and can help put your subjects in a relaxed mood for their photo session.
- Walking together hand in hand: This classic wedding pose will never go out of style. Have your subjects hold hands as they walk away and you snap some shots. You can shoot in burst mode so that you have lots of images to choose from. It’s a great way to create a symbolic representation of the couple walking into the next stage of their lives together.
- Back to back: There are lots of ways you can shoot this romantic pose. You can shoot from the side so they’re both in profile, or you can shoot facing one of the partners so the other is more in the background. Wherever you shoot from, experiment with having them gaze in different directions until you get the right shot.
Traditional Wedding Photography Poses
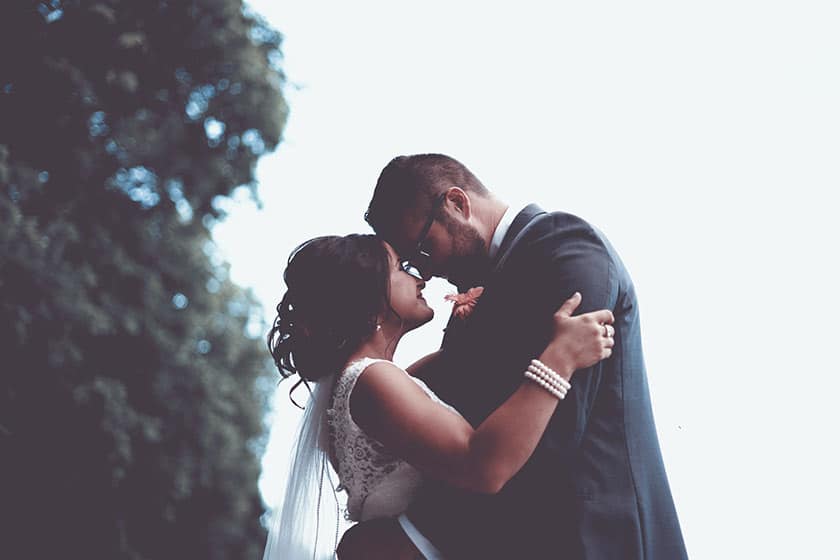
- Forehead to forehead: Have your subjects face each other and touch foreheads together as they either gaze down or into each other’s eyes. This is a classic wedding photography pose that feels both elegant and romantic.
- In the car: A traditional wedding photography poses that will always be in style is the classic shot of the newlyweds getting into the car that takes them away right after the ceremony. You can also shoot this as they arrive at the reception.
- The V-Up: This is where you have the couple hip to hip slightly facing each other, with their arms propped up to form a V shape. The V doesn’t have to be dramatic like a hand propped on the hip, but the idea is to avoid having the couple’s hands dangling at their sides.
Wedding Photography Bridal Poses
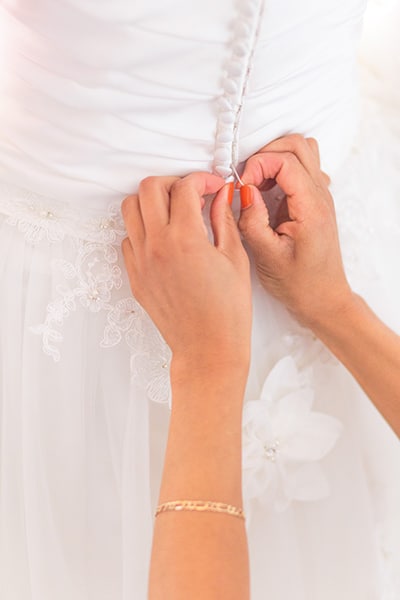
- Getting ready: This can be the bride putting the finishing touches on her makeup, putting on a necklace or earrings, or getting some help from her bridesmaids to do up her dress. The idea is to capture the special little moments before the big moment.
- Holding the bouquet: A lot of thought typically goes into the choice of wedding flowers, and they can be very meaningful. A classic bridal pose is to have her holding the bouquet in front of her with her hands clasped at roughly belly button height, gazing down at the bouquet.
- Looking out a window: There are lots of beautiful ways to capture this pose. A flattering one is to stand behind the bride, have her gaze out a window, and capture her face in profile from behind. If she’s wearing a veil, this can be a particularly dramatic shot.
Wedding Photography Groom Poses
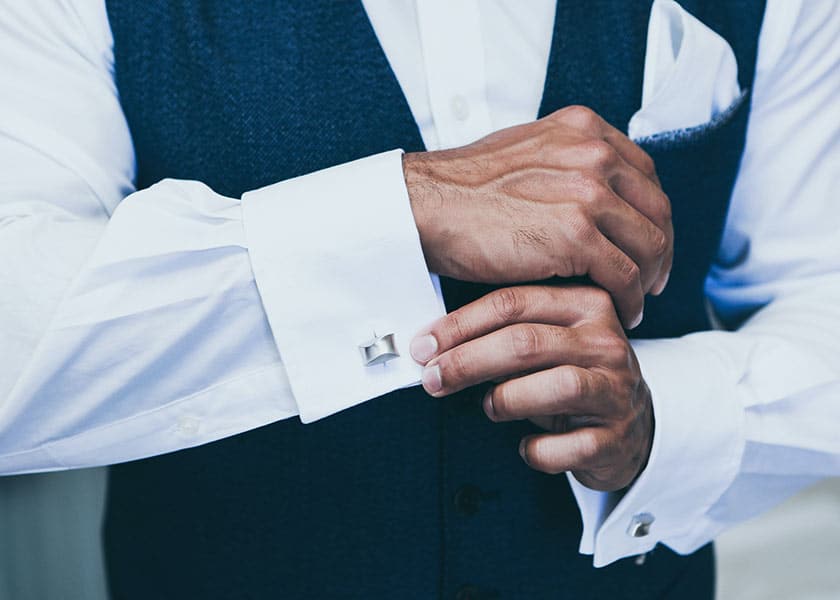
- Doing up the cufflinks: This is the groom’s version of the bridal “getting ready” shot, and it’s just as much of a staple when it comes to must-have wedding shots. There’s something special about capturing the quiet moments before the main event.
- Hands in pockets, gazing to the side: This is a classic pose that will make any groom feel handsome. You can play around with where exactly he directs his gaze; everyone’s face is different, so the most flattering angle will depend on your subject.
- Jacket slung over shoulder: This groom pose is more casual, so he can smile rather than look super serious for it. You can try taking it against a nice backdrop like a brick wall, or have your subject walk toward you as you shoot.
Same-Sex Wedding Photography Poses
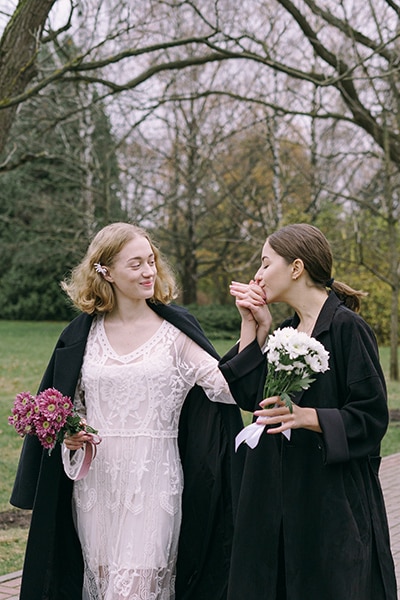
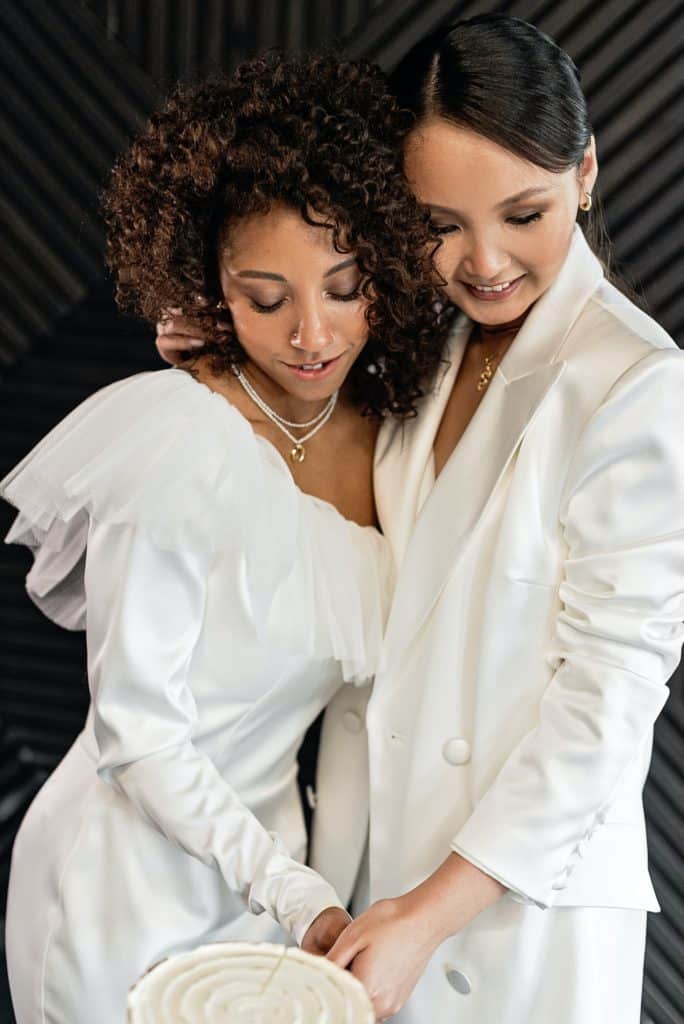
- Holding hands with some space in between: If the same-sex couple you’re shooting is wearing garments in similar colors and fabrics, such as two white dresses or two dark suits, poses with a little space between the subjects to prevent their outfits from blending into one.
- Belly to back: This is a great shot for any couple, including same-sex couples. Have one partner in the foreground, and the other wrap their arms around them from behind. Let the couple guide which poses they each take in this shot.
- Seated, leaning on each other: Seated shots are great because the subjects don’t have to think as much about how they’re posing their bodies. One partner can lean on the other, or they can lean toward one another.
Candid Wedding Photography Poses
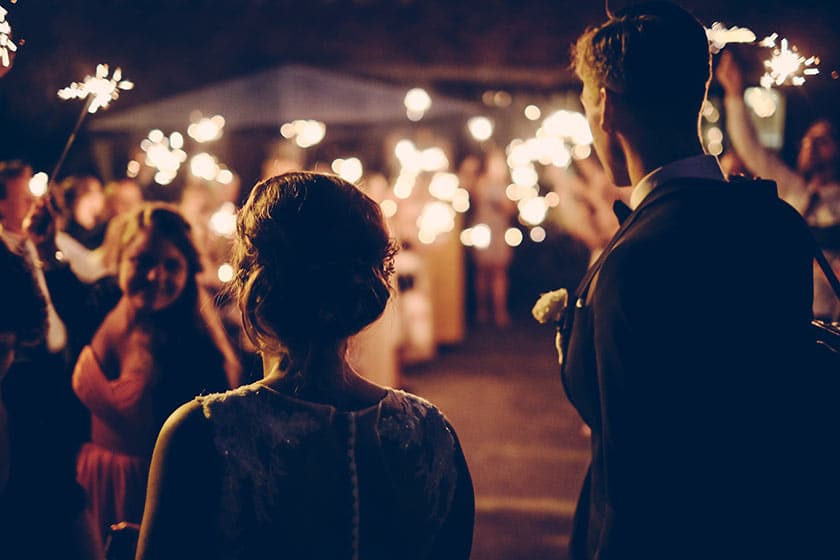
- Laughing: Everyone looks good with a natural smile, so getting your subjects laughing is always a good idea. Even having them “fake laugh” a few times will get them to start laughing in earnest at the silliness, making for some beautiful photos.
- Guests arriving: Your clients will want to look back on images of their friends and family on their special day, so getting some shots of them arriving is a good way to get candids when they’re looking their best.
- The bouquet toss: Part of why this tradition endures is because it’s an excellent photo op. Try to capture it from an angle that includes the bride as well as the guests.
Wedding Photography Family Poses
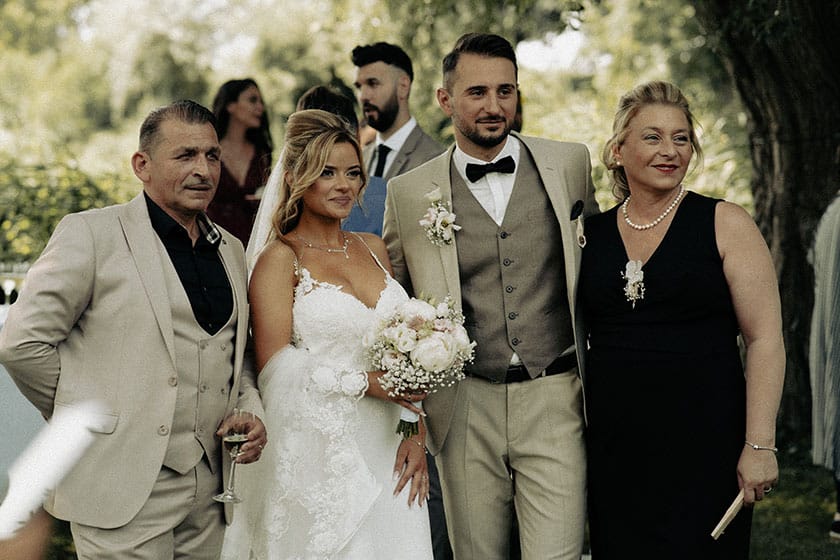
- Looking toward the couple: Have both lined up on either side of the couple, and get a shot where everyone is looking in toward the couple in the center, who are looking at each other. It’s a nice twist on the traditional family shot.
- Framed by a kiss: A more playful family pose is to have the couple stand a couple of feet apart while leaning in for a kiss, with the family squeezing together in the background so they’re framed by the couple. Family members can make shocked faces if you want to go with the goofy angle.
- Seated tiers: Don’t forget to include some classic poses, like having the family seated and arranged so that their faces appear on two or three levels. This way, you don’t have to shoot from as far away, as you would if they were lined up.
Outdoor Wedding Photography Poses
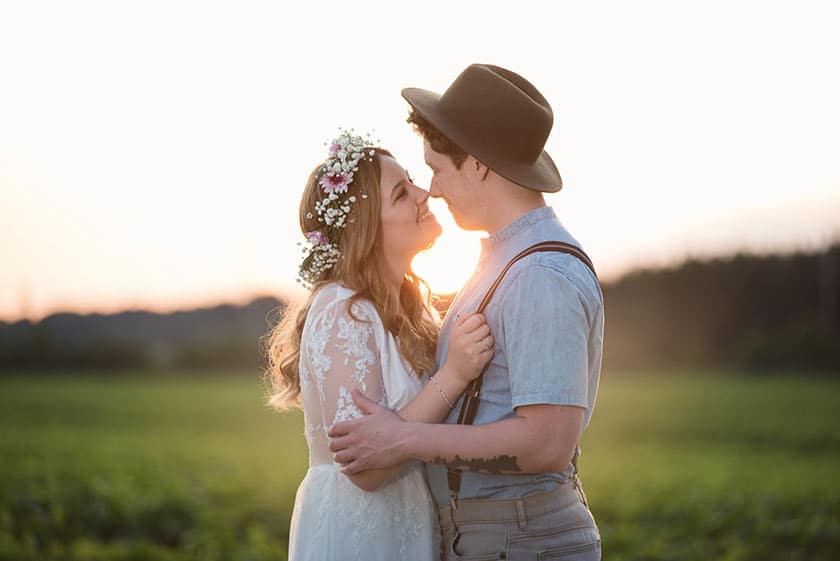
- On the shore: There’s something romantic about the water’s edge, whether it’s an ocean or a lake. Have your subjects walk along the shore, or capture them as they face each other with the water in the background.
- Silhouetted: Silhouette photography can be particularly striking if you shoot during golden hour or as the sun is setting. If the wedding schedule allows it, take some shots of the couple holding hands as they stand at some distance for a distinct silhouette.
- Against a tree: A tree is a great prop for posing. The couple can lean against it on opposite ends looking backward for a flirty image, or they can kiss while one partner leans against the tree for a more romantic, intimate shot.
Beach Wedding Photography Poses
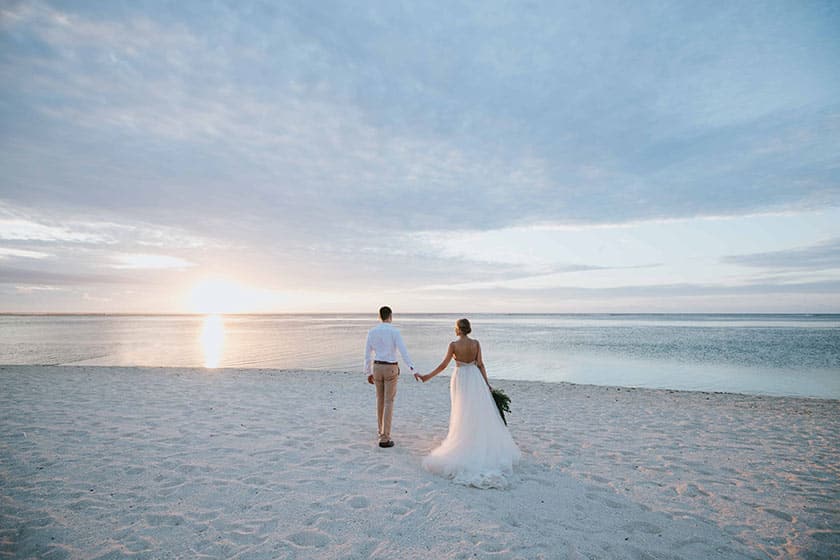
- Walking barefoot: You’ll want to get this shot after the main ceremony since there’s a chance of the garments getting a little dirty, but no beach wedding is complete without some barefoot toes in the sand.
- Foregrounded by a heart: Draw a big heart in the sand, and have the couple facing each other in the V-up pose. Pose them a few feet behind the heart, and shoot from a slightly lower angle so the heart is in the foreground and they’re in the background.
- Seated in the sand: If the couple isn’t too fussy about the sand, have them sit down with one seated between the other’s legs. They should look casual and relaxed like they can sit back and enjoy their newlywed bliss after the festivities.
Fun and Unique Wedding Photography Poses
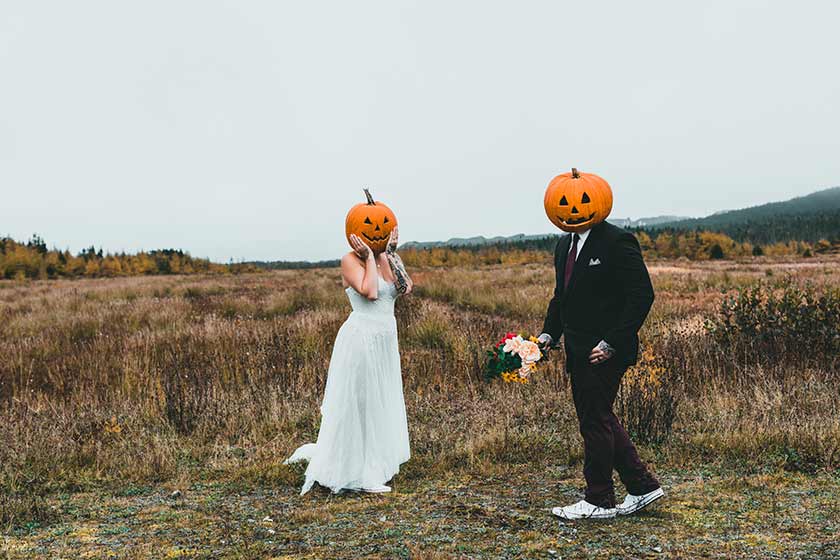
- Groomsmen holding back the groom: Pictures with the bridal party should be a bit fun, and this pose is sure to have everyone laughing. The groom is chasing after the bride as she passes by, while the groomsmen try to drag him back.
- Surprise: Have the groom sneak up behind the bride when she thinks she’s having a solo portrait taken, and vice versa. For best results, have the partner doing the sneaking up jump up and surprise their partner.
- Arm wrestling: Marriage is about compromise, but it also requires some toughness. Having the couple engage in an arm wrestling match for a few photos is sure to bring them laughs every time they break out the wedding album.
Wedding Photography Lighting Tips
Since every wedding you shoot will be at a different location, it’s essential to know what the lighting situation will be before the day of the shoot. Sometimes you may want to pack lights, reflectors, and other accessories, and other times natural lighting will do. During the ceremony and reception, you generally have to work with whatever the lighting situation is, so your camera settings will have to compensate for low light.
Natural Light
- Window light: Even when shooting with nothing but natural light, you can get soft spotlight effects by shooting next to a window. Scope out the window situation and consider where the sun will be throughout your shooting window to catch the best light.
- Golden hour: The hour before the sun begins to set is warm and universally flattering, so make sure to get some shots at this hour if possible.
- Dappled forest light: If you’re shooting around trees, look for areas of dappled light to create an ethereal quality in your images.
- Use reflectors: When shooting portraits outside, have an assistant bounce more light on your subjects with a reflector if necessary
- Have an f/1.8 prime lens: A lens that can open up wide will let you capture better images in low light, so if you’re shooting in evening light or even at night, you can still get gorgeous images.
Artificial light
- Use a flash diffuser: You’ll likely need flash if shooting indoors with artificial light, but avoid harsh direct flash. A diffuser will soften your portraits.
- Pack studio strobes: If you’ll have the space to set up some lights, studio strobes are a good bet because they’ll overpower other ambient light sources so you can get a better white balance.
- Try colored gels: These can go on your strobes or your on-camera flash and are a good way to play around with creative lighting effects.
- Bounce your flash: If the room allows for it, try pointing your flash at a white wall so it bounces back on your subjects. This will create a softer look than pointing it at them directly.
- Try backlighting: Place your light source behind your subjects for an appealing, romantic aura.
Continuous Light
- Make low-light scenes pop: If you’re shooting in a low-light indoor setting, having a continuous light in your kit can help you easily illuminate your shots.
- Avoid fussy strobe settings: when you need to get a shot fast, a continuous light can be a lot quicker than setting up your strobes.
- Play with flood and spotlights: Choose a continuous light that has both floodlight and spotlight settings for different scenarios.
- Get an assistant: You’ll need an extra set of hands to use a handheld continuous light at weddings.
- Pack an extra battery: Continous lights can run out of battery juice fast, so be sure to pack at least one extra.
Low light wedding photography
- Equipment matters: To be prepared for low light settings, look for cameras with good low light performance and lenses.
- Shoot RAW: This file type will give you much more material to work with when it comes to post-production.
- Bump up your ISO settings: some cameras perform well even at higher ISOs, so try yours out and see if you can use a higher setting without sacrificing quality.
- Bring a tripod: you may not be able to use it during the whole wedding, but it can come in very handy for low-light shots.
- Look for alternate light sources: for example, candlelight and window light can make for beautiful images in a low light setting.
Church Wedding Photography Lighting Tips
- Know the restrictions: Some churches don’t allow flash photography. Make sure you know all the rules before the day of the shoot. It’s a good idea to chat with the officiant before the ceremony to know what the limitations are.
- Scope the location: In addition to shooting restrictions, get a lay of the land so you know where you’ll shoot from without too much fussing on the day of the wedding.
- Ask the couple to walk slowly: The images will come out better if they aren’t rushing down the aisle, since you might have a slightly slower shutter speed due to the low light.
- Stained glass light: If the church you’re shooting in includes stained glass windows, the light flowing through can make for beautiful portraits.
- Know where key family members are seated: That way, you can be sure to capture their expressions during the ceremony.
Wedding Reception Photography Lighting
Camera and Equipment
- Raise your ISO: wedding receptions tend to be dim, so don’t be afraid to bump it up a lot higher than you normally would.
- Shoot black and white: you may not want to do this for the whole reception, but black and white photos tend to look great even at very high ISO.
- Balance your flash to the existing light: try to have your flash match the ambient color temperature.
- Pack a zoom lens: with people dancing and moving around, a zoom makes it much easier to capture all the action.
- Use shutter drag to spice up your dance floor pics: move your camera fast while shooting at a slower-than-normal shutter speed to create light trails.
Preparation
- Know the venue: scope the wedding location in person in advance so that you can see all the different light sources and get a sense of what the light situation will be.
- Pack extras: your camera bag should have extra batteries for all your light accessories as well as your camera.
- Look for outlets: know where you can access electrical outlets in case you need to charge any of your equipment between uses.
- Plan your location: you should have a couple of key spots you can shoot from with good sight lines during the speeches.
- Bring different modifiers: Have several different types of light modifiers just in case; it’s better to be overprepared than underprepared.
Light Modifiers and Accessories
- Use bounce flash: Guests won’t love having a flash in their face all night, so aim your flash at the ceiling and bounce it down if possible.
- Use magmod modifiers: These can be used to modify your on-camera and off-camera speed lights for different effects.
- Use a flash that doubles as a trigger: you can set up additional lights triggered by your flash if the space allows for it.
- You don’t have to use off-camera flash: In a wedding reception scenario, on-camera flash is just fine. Just consider softening it with modifiers or diffusers.
- Try using video light: some photographers use video lights as a constant light source to see what their images will look like in real-time.
Post Production
- Shoot RAW: this will make your post-reception editing process much easier and result in better photos.
- Use tone setters: Choose a photo and edit the tones, then apply those edits to all images taken in the same location and lighting.
- Retouch the noise: Since reception lighting might require you to bump up the ISO, make sure to adjust the color noise and then luminance noise for a crisp image.
- Batch edit: this is essential, since you may be editing hundreds or even thousands of images.
- Bump up the brightness if necessary: if you shot RAW, you should be able to brighten dark photos easily.
Outdoor Receptions
- Bring a rain cover: hopefully, you won’t need it, but it’s always good to be prepared.
- Check your color balance: your settings will be different on a bright, sunny day compared to a gray one.
- Find shade: if you happen to be shooting when the sun is very bright, your subjects might be squinting in their images. In that case, try to shoot in a shady area where people will look their best. If you’re struggling to find a shaded area try to keep the sun behind your subjects to minimize the squinting.
- Expose for highlights: this way, you won’t end up with parts of the image that can’t be recovered when editing.
- Pack some polarizing filters: you might find yourself reaching for these to cut glare if you happen to be shooting in bright light.
Frequently Asked Questions
How to use flash photography for weddings?
Flashes come in very handy in wedding photography because you need to capture the events without causing too much disruption. This means that big lighting setups are typically out of the question. To make flash photography look its best, use modifiers and techniques like bouncing the flash off of white ceilings rather than pointing it directly at your subjects.
How to pose wedding photos?
Talk to your clients in advance to understand what kind of images they want. Some will want lots of traditional shots, some will want a more casual, bohemian look, and many will want a mix. Know your client’s goals, then select poses that work with their vision.
How to pose mother of the bride for wedding photos?
The wedding day is a special day for the mother of the bride, so be sure to include some portraits of her and her daughter. She can be helping the bride get ready, and you’ll also want to get some shots of them holding each other’s hands and looking at each other.
How to pose mother of the groom for wedding photos?
A classic mother of the groom shot is to have him behind her hugging her. Depending on their height, it may look best to have the mother of the groom seated as her son, the groom, hugs her.
How to pose bridesmaids for wedding pictures?
Have the bridesmaids angled at about 45 degrees to the camera, towards the bride. This is a flattering angle that will make everyone look their best, which is helpful when you’re responsible for capturing lots of people at once.
How to pose wedding couples?
While you’ll go through lots of different poses in your photo session, it can be helpful to start with some playful shots to help the couple feel at ease. Easy, romantic shots where they don’t have to look right in the camera are also a good place to start your session.
How to pose wedding couples naturally?
Having the wedding couples walk as you capture them is a great way to get some natural shots. People are less self-conscious when they’re in motion, which makes for good images.
How to pose for beach wedding photos?
An important consideration when posing for beach wedding photos is the lighting since the water and sand can both reflect a large amount of light. Make sure you pose the couple in a place where the light looks flattering. Try poses at some distance from the water if they need to keep their outfits intact.
How to pose group wedding photos?
Large groups are hard to pose because if you just line everyone up, you’ll have to shoot from far away and people’s faces won’t be very visible in the shot. Instead, try to place your subjects in two or more rows so that more of your landscape-oriented image is filled with your subjects.
Build an online portfolio website you love
Put your portrait photography in the spotlight.