Behind the Scenes at Mpix – Color Correction by Matt Miller
August 31st, 2010
Here at Zenfolio, we want to give our customers the best, which is why we have a special partnership with Mpix, a division of Miller’s Professional Imaging.
Mpix is an online digital imaging lab for both the professional photographer and the advanced amateur. This lab provides uncompromising quality of prints and services and is the top choice for professional work and photos requiring the absolute best in digital printing. Mpix has decided to open their doors and start a mini-blog series on what goes on behind the scenes.
Behind the Scenes at Mpix – Color Correction
Welcome to an inside look at Mpix. Today we want to let you inside our doors to take a look at color correction. What is color correction, and how does it benefit you as a photographer?
What is Color Correction?
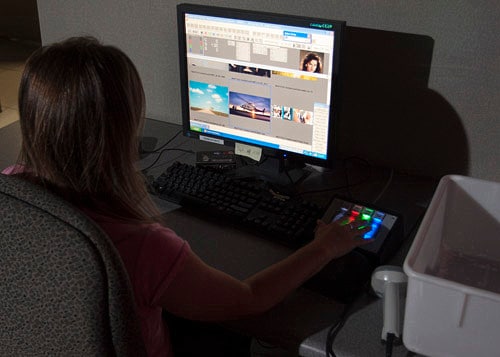
Color correction is a term used to describe the process your image goes through before being printed in our lab. When an image is ordered, our trained color technicians review the image on calibrated monitors in a dark room to ensure the color and density of the image look as best as possible. Here they will make any adjustments needed to the image before it becomes a print.
Our technicians are not entry-level hires, but persons with upwards of 20 years experience in color adjustment. In fact, most of the color technicians working in Mpix today got their start working with film at our parent company, Miller’s Professional Imaging! Each color technician undergoes color testing before being hired for the position, and that testing and training continues even after the fact.

Each image is hand corrected by an individual. We do not auto-correct or set a base correction for an order. Every image in your order is as important to our employees as it is to you and your customer.
Another cool fact: Our monitors and printers are calibrated every two hours to maintain consistency and accuracy throughout the color correction process.
Why is Color Correction right for me?
For most photographers, color correction is an insurance policy against color variances. By allowing us to color correct your images, you receive a guarantee that you will be happy with the color of your prints.
As the digital revolution grows and more photographers sell the reprint rights to their images, it becomes equally important to trust your lab. When your end-client makes a print of your image, you want the print to match your standards – this is where Mpix color correction and overall quality come in to play. By turning on the color correction option, you can rest easy knowing that the prints your customer receives will be perfect.
For those who prefer to do their own color adjustments, we do offer a “do not color correct” option. We cannot recommend this enough: If you choose to turn off the color correction feature, please make sure you have calibrated your monitor to match our settings (more on that below).
Color Correction Tips
– Make sure your images are in sRGB color space.
– Laptop screens are impossible to calibrate. Try using a CRT or desktop monitor for viewing.
– Stay away from the light! Ambient light can severely alter how your on-screen images look.
– If you are familiar with color calibration and would like to soft-proof your images, you can download and install paper specific profiles here.
– Mpix does offer a calibration kit for only $3.00 if you prefer to adjust your own images.
Matt Miller
Mpix Community Administrator


