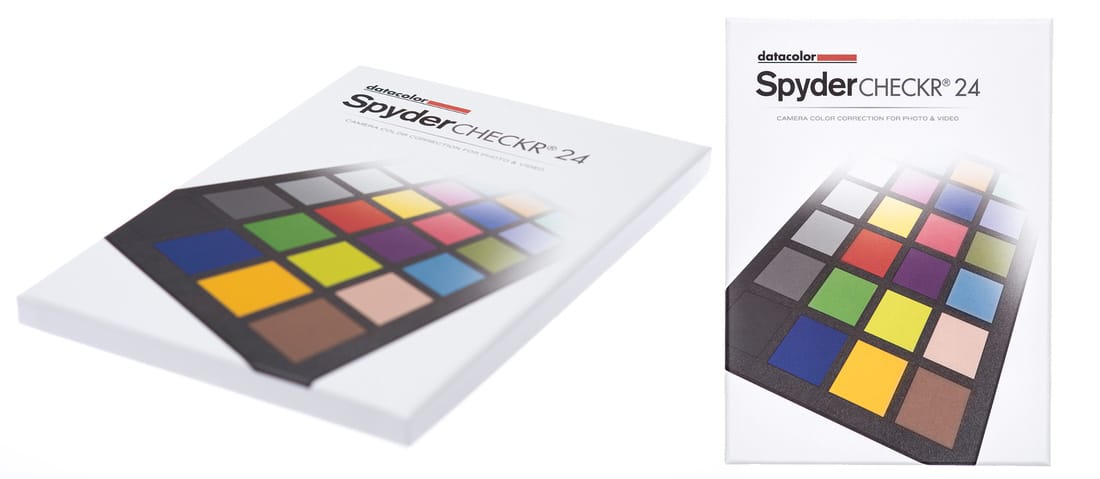
Product Spotlight: SpyderCHECKR 24 Camera Color Correction for Photo & Video
September 22nd, 2014
It’s all very well going out to shoot professional images, but there’s often a part of the workflow that falls by the wayside—getting the colours that you see on set to be correct when your images go to print and web.
There is no doubt that colour calibration is an absolute must if you are shooting professionally, and nowadays it’s very affordable to calibrate your monitor. It’s important that your display shows the right colours, and then you can make adjustments based on these settings.
For those a little unfamiliar with colour calibration, it ensures that at every step of the way you are doing your best to guarantee a standard set of colours that will move through your workflow up to the final point of delivery.
At the very least, you should do this so that you have accuracy when dealing with your clients. If you shoot a red dress in a fashion shoot, how do you guarantee the red that is printed is the same red that you saw when you took the shot initially? You need to ensure what the client gets is as near as possible to the original.
The calibration journey starts at the very point of capture—to do this you need a standard set of colours that has a set of known values. Enter the SpyderCHECKR 24 from Datacolor.
 What you have is a bunch of coloured squares on one side and some grey squares on the other. The colours all have known values—so the red is a red with a set density and quality. When you load in the accompanying software, the software knows the value of this red, as well as the other colours. The ‘target’ has 24 patches with specific spectral color values. The other side of the SpyderCHECKR 24 can be used for setting the white balance in your editing software and is very handy to have nearby.
 Here’s how to use it:
Pop the SpyderCHECKR 24 into the scene you’re shooting, light with a single light source with no reflectors or diffusers, and make it as evenly lit as possible. If you want to do this outside, try and avoid direct skylight because the sky diffuses and skews the results.
It’s important to leave a border around the card and not fill the viewfinder with the target as some lenses may vignette and go softer at the edges. You can always crop it later. The target should be as square onto the lens as possible so that the rectangle is even on the screen. It’s quite easy to use live view for this, and you’ll probably find a tripod useful as well.
Calibration presets are produced in formats for use with Hasselblad Phocus, Adobe Photoshop, Adobe Lightroom, and Adobe Bridge. From Adobe Camera Raw, presets can also be exported in sidecar file format (.xmp) for use in any other applications that utilize sidecar file formats.
You can tweak the grey side image using the grey patch and the white balance settings; this is usually the eyedropper in most editing packages.
Once you’ve done this, crop the image so you can see the rectangle and not much else. Next, edit this image with the SpyderCHECKR 24 software. It will process your image and load all the colour patches.
The software then looks at the known values of the patches with the patches in your shot and compares the two. Then you can save this calibration setting with the camera name, and perhaps light source or lens for future use. And then you are done.
Once you’re back in your editing package, you will need to apply the saved preset. In Adobe Lightroom this would be a user preset.
If you don’t see a HUGE jump in colour between the non-calibrated shot and the calibrated shot it’s because your camera is shooting quite accurately. However, this will vary from camera to camera and location to location. That’s pretty much it—of course if you’re on the shoot and you change lenses, then you’ll need to shoot another test chart because each lens will have it’s own optical signature and affect colours differently. All things considered, the SpyderCHECKR 24 is a very useful tool to have in your camera bag.

Rick Bronks of Satureyes Photography loves crafting together great images and stories. His background as a TV producer has helped him create strong narratives and visual themes with his photos. Over the last decade, Rick has established himself as a leading photographer and video artist of live events. You can see more of his extensive portfolio on his website: https://www.satureyes.com/


