Making money with indoor studio photography sessions.
February 23rd, 2024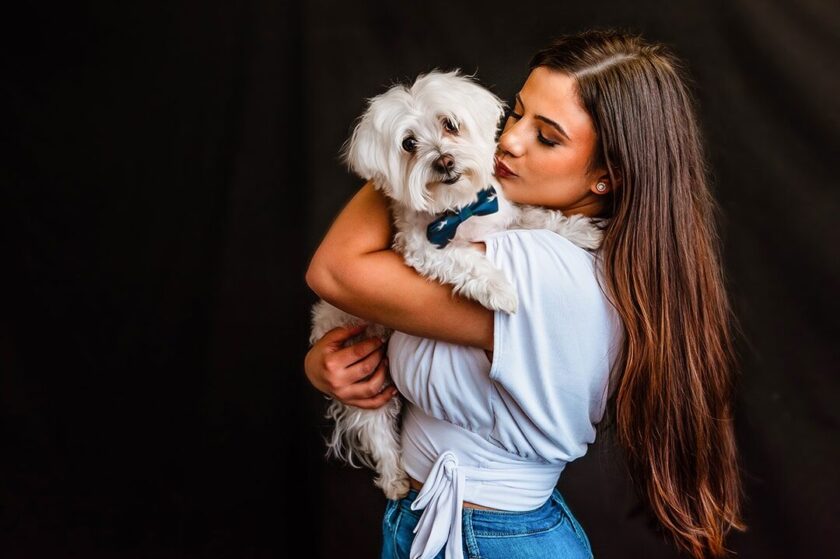
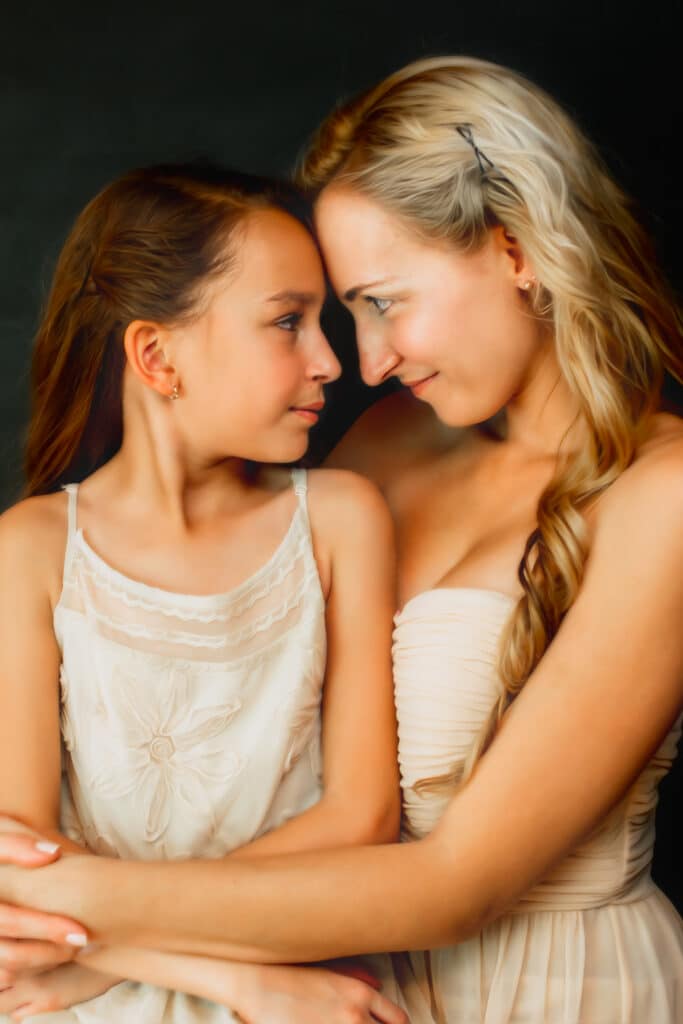
*Photo credit: Jani Tzolov of JS Portrait Studios
At one point or another, most photographers have had to reschedule photo shoots. Last year alone, I rescheduled sessions at least 4 times due to crazy rainstorms! Relying solely on outdoor locations can add another layer of stress to your photography business–especially when you live in cold or rainy climates where you regularly face unpredictable weather conditions.
Limited space and using lighting equipment can feel intimidating when you aren’t used to offering indoor sessions, but with an open mind and some practice, this practical solution can help you maintain a thriving photography business year round. Working with the spaces you have available, investing in durable equipment that can be stored in compact places, and marketing your services accordingly will save you and your clients the inconvenience of rescheduling and leave more of your time available for booking photo sessions.
Think about it–what if you could operate your photography business during your available time 365 days a year; through winter months, rainy days, high winds, and other challenging weather situations? For many full-time portrait photographers, it’s not feasible to design your photography business around exclusively outdoor locations. With certain types of photography, like pet portraits, newborns, headshots, product photography, and more, having an indoor space can be a huge asset to your bottom line.
Whether renting shared professional photography studio space, finding a solo space to rent, creating a studio in your home, or putting together a mobile studio setup for shooting in your client’s homes, there is a solution that will work for you. We’ll get to the pros and cons of these options later. To begin, let’s get into the basics of what you’ll need, and how to get started using studio lighting effectively.
Optimizing your studio lighting setup.
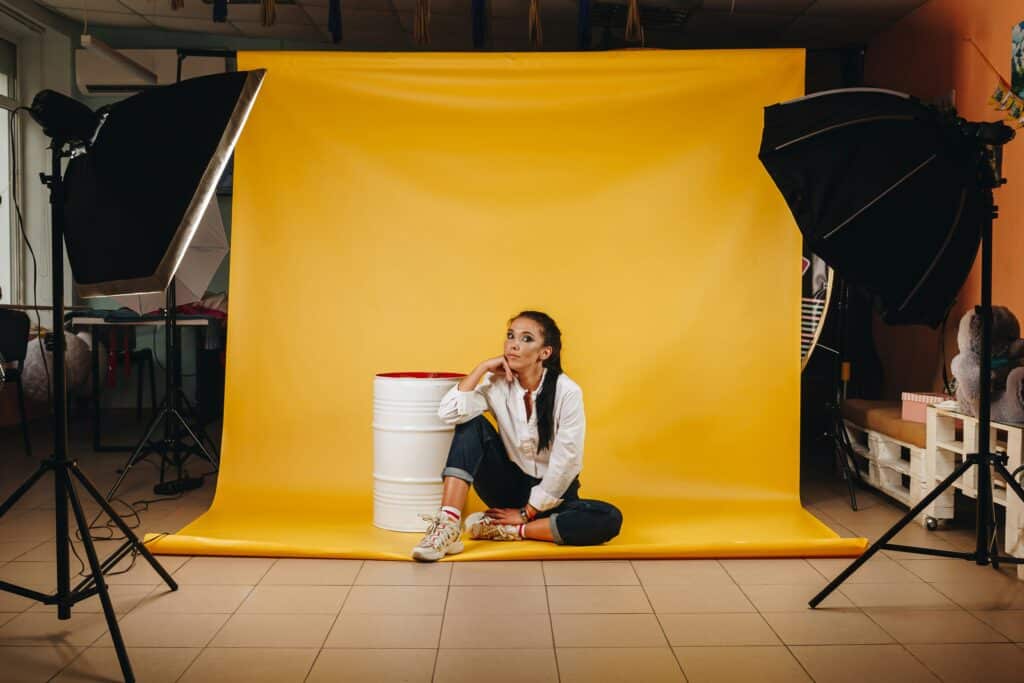
If you decide to create a photography studio in your living space, or to offer clients the ability to photograph them in their home or business, you’ll need to invest in studio lighting and equipment, such as off-camera flashes and strobes. You will also need lighting accessories, including reflectors, lighting mounts, umbrellas, softboxes, and wireless or cable triggers to sync your lights with your camera. This monetary investment may take some time to build up, but putting money into getting the proper gear to be able to shoot indoors will increase your revenue generating capacity year round.
Lights:
While your detachable camera flash could serve as one of your light sources for a setup when you’re first starting out, you’ll still need a lighting stand, softbox, and at least one reflector for fill light. As you do more indoor photography shoots, you’ll likely realize you do want more or better lights–having at least 2 will allow you far more diversity and flexibility during your shoots. When your budget allows, we recommend switching to strobes or speedlights.
Reflectors:
Another must-have for your lighting kit is a reflector–when you have one light, you can use the reflector for fill light, creating a less contrasty lighting environment. A basic reflector is all you need to get started–you can expand your options as you get familiar with using the lighting set-ups and determine whether more specialty reflectors are necessary.
Other Light Modifiers:
Beyond your reflectors, at least one other light modifier is needed to optimize studio lighting; this should either be an umbrella or a softbox. While both are capable of diffusing the studio light, they have some key differences. An umbrella will produce broader diffused lighting (similar to open shade in outdoor light) that is uncontrolled and uncontained. On the other hand, softboxes offer controlled, direct lighting, more similar to sunlight coming through a window. If you’ve never used either, the umbrella is typically easier for beginners. Whichever you begin with, opt for equipment that can be easily taken down for storing or transport.
Light Stands and Flash Triggers:
Lastly, as mentioned earlier, your lighting setup will need to include light stands and flash triggers so you can remotely trigger the flash. An important tip–make sure the flash trigger you choose is compatible with your camera model, or it won’t work. There are both wireless and cable options–while cables don’t need battery power and are super reliable, they aren’t as safe an option when photographing subjects that might move around a lot, such as families with small kids. Consider your subjects and then choose the trigger that is right for your clientele.
For your light stands, I recommend purchasing quality, heavy duty stands so they can support the weight of both the light and your modifier. You will need one for each light in your setup, and some bag weights for safety.
Backdrops:
For some types of shoots, you can light the space and shoot without a backdrop. For others, such as basic headshots, posed newborns, and types of product photography, using a backdrop is an easy way to change the mood of the image and provide a distraction-free background for your subject. Backdrops can be rolls of paper, large pieces of fabric, printed plastics, and even oversized stiff “cards” for small items like food photography. You will also need an adjustable backdrop stand to hold your chosen backdrop material up behind your subjects, and smaller items like clamps and masking tape can come in handy to secure it in place.
Create a versatile yet simple studio setup.
Once you have the equipment and the proper lighting pieces, it is time to set up your studio. Here’s what you need to remember: keep it simple. Your studio setup should be flexible so that you can shoot various styles. You will want the setup to have the light and reflectors coming from different angles or backdrops in different spaces. You also want to keep it simple as you may be doing mobile shoots, where you need to have the ability to bring your studio with you–some photographers enjoy the flexibility this offers their business. If your space is tight, you may have some limitations as to the size of group you can photograph, but you can typically make even tiny spaces work for 1-3 subjects.
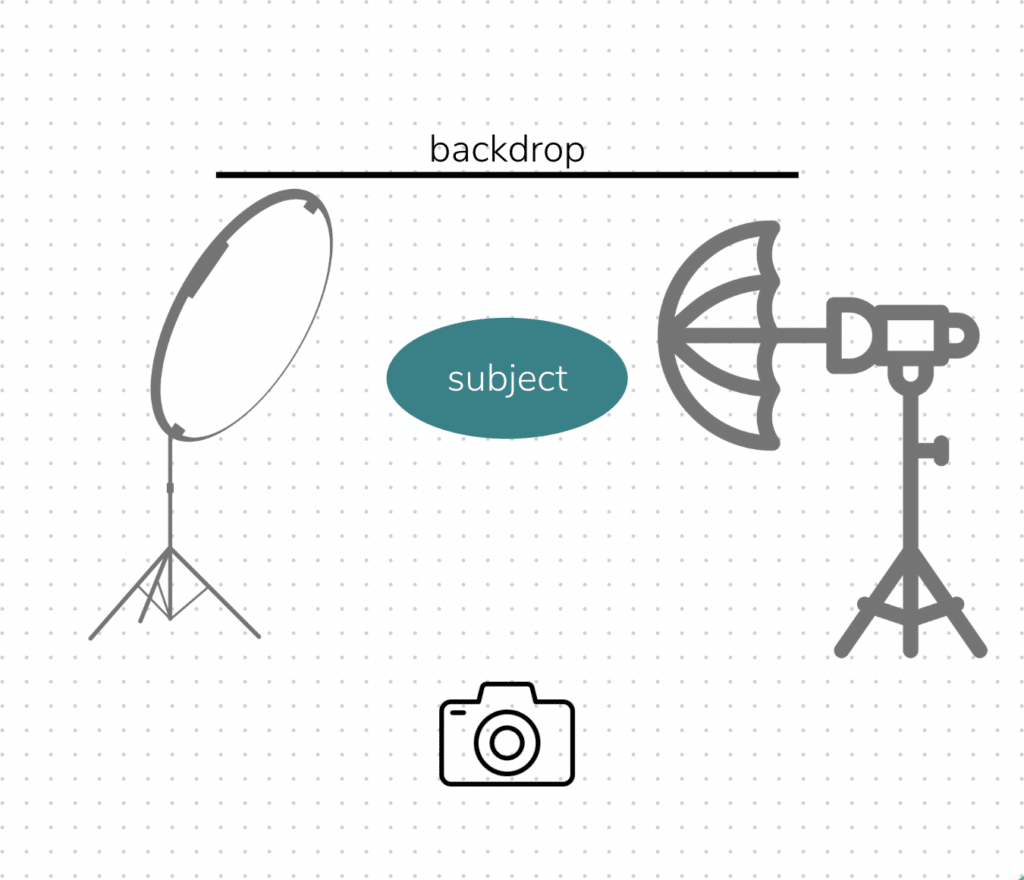
One common setup for a single light is to create a triangle formation between the background, the lighting w/ modifier (like your umbrella or softbox), and your reflector. Your subject will be placed within this triangle.
With two or more lights, you can have one light behind your subject, either as a backlight or to brighten your backdrop, and then place the second light with the modifier above and in front of your subject, with a reflector below. This setup is frequently used for headshots–watch an example of this setup by UK based headshot photographer Martin Hobby here.
Pro tip: To find the lighting style that best suits your aesthetic and matches the rest of your work, take time to play with the height and angles of the lighting umbrella and reflectors, adjusting how the light hits your subject. Compare angling the light straight toward your subject through the modifier versus shining it from a 45 degree angle above them. Try different angles and distances with your reflectors–no reflector, or one placed farther away, will result in more harsh, dramatic light and shadows. Placing your reflector closer, or using more than one reflector, will create softer shadows or flatter light.
Beyond the money you invest in the lighting for your studio set up, it is a good idea to purchase a background, as mentioned earlier. If you are on a budget, get creative; there are many photographers out there that use vintage sheets, sew large pieces of fabric together and paint them the desired color, or give their wall a fresh coat of white paint–even when they can afford to buy other options. You don’t need to spend tons of money to have a backdrop that looks amazing in your photos.
To rent or not to rent?
If you are feeling hesitant about spending money on a setup before you get comfortable with studio lights, consider renting a shared studio or public studio that already includes all the necessary lighting gear, stands, modifiers, and some props. One of the pros to choosing this route is saving the money on the upfront equipment costs, and allowing you to try out different kinds of lights and modifiers. Then, when you decide to purchase a studio setup, you’ll be familiar with which brands you liked best and whether you prefer an umbrella or a softbox.
Renting studio space can also give you the opportunity to network with other photographers–you may even find one or more photographers to permanently share a commercial space with, cutting down on monthly costs, and potentially dividing up the startup costs for the lighting and other essentials.
When debating which is the best option for you long-term, consider these factors: the price of renting a space will be an ongoing cost, whereas creating your own home or mobile studio has a more significant upfront cost, but then only the cost of insurance and occasional equipment updates. Another element of renting a shared space is possible schedule restrictions, based on what you’ve agreed upon or what is currently available–when you have your own lighting kit, you can create the schedule around what works best for you and your clients.
Crafting your indoor services and client experience.
Once you’ve got the necessary equipment for shooting indoor sessions, we recommend taking time to shoot some practice sessions with friends or family, or offer free shoots to hone your skills through model calls. Once you feel confident you can deliver consistent images to your paid clients, you are ready to start incorporating these new skills into your service or session packages.
Create studio service packages.
You have your studio, the next actionable item is to develop specialized packages for indoor studio sessions. This will help narrow down a target audience for each type of shoot and determine who you are marketing to. When you market your package, it’s important to clearly communicate the benefits of the studio package in all of your messaging.
Lean into the features on Zenfolio to help with your studio packages, like the email templates and targeted marketing. You’ll also want to utilize the built-in services for booking these sessions directly through your website.
Pro tip: Plan out and create indoor service offerings, like seasonal mini-sessions, once a month headshot sessions for local entrepreneurs, or classic b&w children’s portraits. Think about your client’s needs or problems, and get creative with providing a solution!
Preparing in advance for a great client experience.
Just as you do with your other services, having your contracts, model releases, client questionnaires, and welcome packet ready will allow both you and your clients to be on the same page. Having everything ready before you begin offering the services–from “how to book” to “what to wear” to sharing what happens after the session–not only saves you time answering these questions individually, but helps clients feel more comfortable with the process.
Wrap things up with secure client proofing.
Your clients’ experience with you as a photographer is going to include the pre-shoot, the studio shoot itself, and the proofing process when the clients choose their favorite pictures before purchasing. Utilizing Zenfolio’s client proofing features allows you to create a customized gallery where the client can select their favorite images, leave comments for you, and even purchase their images in your customized online store. Additional gallery securities like password protection and watermark settings also allow you to customize client access, search engine permissions, and increase protection of your images from screenshots.
Promote your indoor sessions.
Once your studio and services are all set up, you’re ready to do a hard launch to promote your indoor studio sessions. Filling the time slots for the studio packages you’ve created is an important step in generating revenue for your photography business. Focusing on the specific themes for the service packages you’ve created will help you narrow the target client audience and make marketing plans for them. Utilize your social media platforms and your Zenfolio website direct marketing features within the promotion.
Leverage social media to reach potential clients interested in studio photography.
If you aren’t already leveraging social media to promote your business and reach potential clients, you aren’t maximizing the resources in front of you. While we all love the word of mouth marketing we get from happy clients, having an online presence makes it even easier for them to share your work. Your social media profile also provides an opportunity for potential clients to get to know you, see your latest work, and easily find your portfolio website. Here are some ideas that you can use on social media to create interest in your studio services and encourage photography bookings:
- Create reels that showcase you preparing the studio space, such as any building, painting, sewing, prop-making, etc. Don’t be afraid to show the messy and the fun parts of the process.
- Show behind the scenes content of what the studio looks like once set up, various backdrop options you may offer, and available props or client wardrobe items. You can use this video by California-based photographer Stephanie Schnautz as guide.
- Create a seasonal backdrop and offer it only for a limited time. For example, a Christmas styled bench area for family, children, or pet minis–or collaborate with a local florist to create an artful display of fresh flowers for Mother’s Day portraits.
- Share work created in the new studio–this could include a pull-back video of the lighting setup and a few of the final images, or a collection of images with a heartfelt thanks to all who came out, like this reel from Florida-based photographer Jani Tzolov.
Creating buzz around the launches of different studio sessions by “teasing” them with some of these ideas before you open them for bookings will also ensure more of your followers are aware. Instagram stories frequently have higher engagement than posts–to keep from overwhelming your feed with the teaser posts, share some of the teasers in your stories and then save to your highlights, sharing only one or two in your feed and resharing these posts to your stories. Update your followers in stories on how many spots you have left to help ramp up bookings.
Pro tip: Let social media followers know your sessions will be available to your newsletter subscribers first, and make it easy for them to sign up by adding the link in your stories and profile. Your newsletter subscribers have already committed to hearing from you–they will typically have a higher rate of engagement and conversion (meaning they purchase what you are offering.)
Launch an email newsletter.
If you don’t have a newsletter already, there’s no time like the present! Some popular options are Flodesk, Mailchimp, Convertkit, and Constant Contact–I personally enjoy the design options in Flodesk, but you can’t go wrong with any of these options. Once you decide on a newsletter service that is best for you, set up a pop-up or designated section to subscribe on your website.
Next create a quick welcome message for subscribers, and get to work creating a newsletter sharing about your new studio and upcoming sessions available for booking. The goal of your email is to launch your indoor studio offerings–include images of the setup and photographs you took using your studio lights. Keep the messaging clear and simple–make it easy for readers to book their time slot through your website, and include answers to some questions they might have. Refer to the limited time frame for any seasonal services to increase the exclusivity.
As you focus on marketing to potential clients and the types of sessions you will offer with your studio lights in client homes or in your designated space, think about what the best parts of your studio are. Is it the large window that offers natural light during certain times of day–or maybe it is your curated selection of props and wardrobe for styling a shoot that you bring along to every session? Lean into that, and find ways to showcase it.
Increase your sales after the session with automated campaigns.
You did it! You’ve had a successful studio launch booking your available times, your booking tool automatically created your galleries for you, and you’ve photographed, edited, and uploaded the client images. Don’t leave money on the table–Zenfolio has a simple and automated way to help you sell more products directly from your customized online store within the client’s galleries. Automated client campaigns are a marketing tool created specifically to drive sales with custom or seasonal promos. Within minutes you can create a custom discount for everyone in your recent sessions, set banners to appear in their galleries, automatically email them about the promotion, and even send reminders–then watch the orders roll in!


